
The Kinsta API isn’t only for monitoring your site’s security or fetching environment information. In fact, part of our philosophy here is to help you streamline your development workflows.
As such, the endpoints can accompany you from your initial local setup to initial deployment and even your post-launch maintenance. The API can handle most tasks on your to-do list, such as creating environments, cloning sites, and much more.
In this article, we’ll show you how you can develop sites while using the Kinsta API endpoints. Throughout, you’ll learn how to integrate the API into your typical development workflow and understand how to make the process more efficient and smooth. Let’s begin with a quick overview of what the Kinsta API is and what it can do.
A brief primer on the Kinsta API
In short, the Kinsta API lets you programmatically interact with your sites and environments on our platform. We give you a set of endpoints that you can use to perform various tasks, such as creating new WordPress sites, cloning existing sites, managing backups, and more.
This RESTful API offers many benefits to your development projects thanks to its key features and functionality:
- Automation. You’re able to automate common tasks and workflows, which can save time, reduce manual effort, and give you the headspace for more critical tasks.
- Integration. You can integrate the API with your existing tools and systems. Continuous integration and continuous deployment (CI/CD) is an excellent use case for using the Kinsta API and third-party tools together.
- Flexibility. The API can give you granular control over your sites and environments, allowing you to customize your setup according to your specific needs with few restrictions.
if you want to find out more about what’s available within the Kinsta API, check out the dedicated documentation. Even so, we’ll look at plenty of examples across the rest of the post after a deeper dive into the benefits the API can give you.
Why your development workflows can benefit from the Kinsta API
Of course, we love the MyKinsta dashboard for its depth, gorgeous interface, and level of control. However, you can find most of the functionality within the Kinsta AP, too. If you’re a developer, this should be exciting for a few different reasons:
- Faster provisioning. The API will offer a programmatic way to create new WordPress sites and environments. Depending on the scripts you whip up, you’ll likely reduce the time it takes to set up a new project.
- Streamlined collaboration. For teams, the API can help you clone sites and create staging environments quickly. It’s going to be a slick way to collaborate and work on different versions of a site at the same time.
- Automated deployments. If you integrate the Kinsta API with your CI/CD pipeline, you get to automate the deployment process across all of your staging and production environments.
- Consistent configurations. Because you can configure settings across multiple sites and environments with the API, you can reduce errors and make your workflows more consistent.
Enough talk, though: let’s move on to using the Kinsta API. We’ll start with the endpoints that work well for development and then use them within your workflow.
Kinsta’s API endpoints for development
While the Kinsta API offers many endpoints, you’ll gravitate to some more than others. For development, you’ll come back to a few of them time and again:
- WordPress sites. You have a selection of endpoints to help you create, retrieve, delete, and clone sites.
- WordPress Site Environments. You can also manage your site environments through certain endpoints. For instance, you have a number of ways to work with staging sites.
- Backups. You may need to work on site backup management during development. We offer endpoints to fetch, restore, delete, and create them.
- WordPress Site Domains. If you need to add a new custom domain to your hosting, our simple endpoints for managing site domains will be where you turn to.
These endpoints cover the core functionality you’ll need for most development workflows. However, there are others that can supplement the endpoints you use often. For instance, those that handle databases, deployment, caching, and your Content Delivery Network (CDN) all have a role to play.
Over the rest of the article, we’ll walk through how you’d use the Kinsta API for real-world development. In the comments section at the end of the post, you can even share your own examples of where you think the Kinsta API could come in useful – we’d love to hear them!
A real-world use case: pushing a site through development
Let’s try to illustrate how you can use the Kinsta API in practice. There are lots of ways to develop WordPress, so we’ll look at how a web design agency might use the API throughout a workflow. In general, this will involve a few steps:
- Set up a local development environment, initialize a Git repo, and work on the fledgling site.
- Create a staging environment within Kinsta for testing and client approval. This might also involve creating a database and setting up a domain
- Undertake technical set up, such as restricting IP addresses from staging, initializing backups, modifying PHP versions, installing WordPress themes and plugins, and more.
- Carry out pre-deployment tasks such as creating a CDN or implementing caching.
- For the final step in the workflow, you’ll need to push changes from staging to the production environment.
Despite how much the Kinsta API will be featured in this post, our first step won’t need it. Let’s begin by setting up your local development environment, then move on to programmatic elements for staging and production.
1. Setting up a local development environment
Your local environment has to be rock-solid, and each developer will have their own favorite approach. Of course, our choice here will be DevKinsta.
This can simplify the process of setting up your local environment, especially if you use Kinsta’s hosting. DevKinsta is free and offers you plenty of functionality that other similar tools can’t provide:
- The app runs using Docker containers, so it’s isolated from your global system.
- You can choose a custom Top-Level Domain (TLD), such as .local or .staging, that suits your project and workflow stage.
- There’s a choice of PHP version, and Kinsta uses MariaDB databases by default. The latter is crucial, thanks to its superior performance over MySQL.
- There’s a built-in database manager that runs on Adminer.
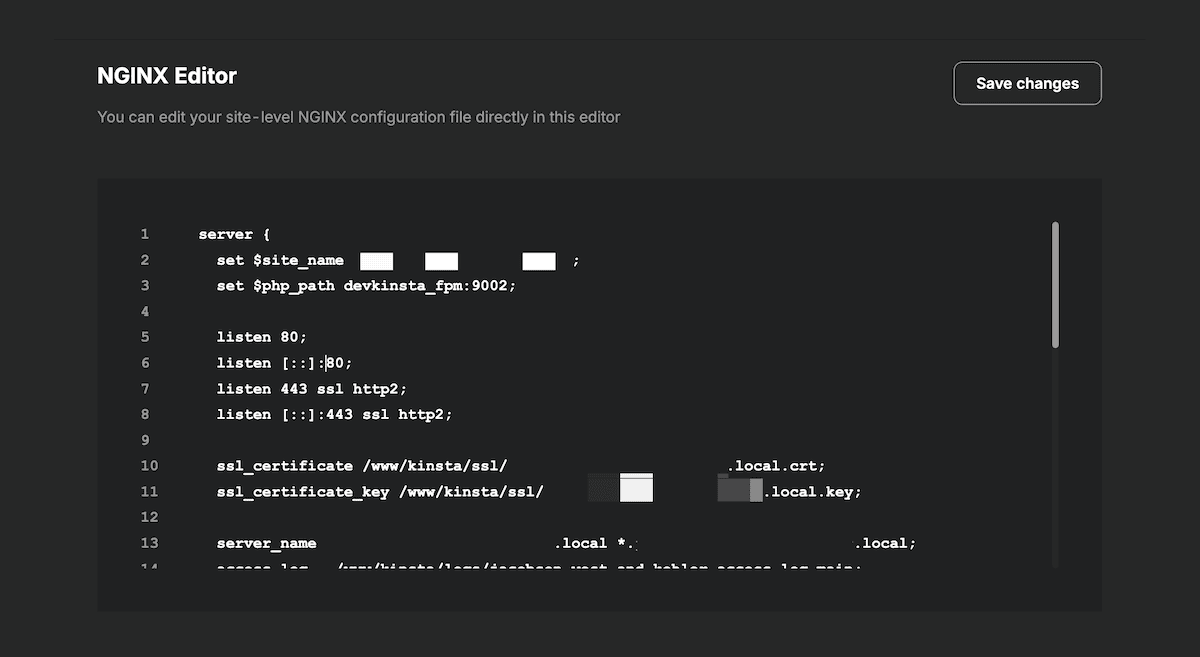
DevKinsta also provides a number of developer-level tools. For instance, you can enable Xdebug with one click and edit the php.ini and Nginx configuration files from within the settings screen:
Setting up and using DevKinsta is beyond the scope of this post, as we want to focus on the Kinsta API. However, we have full documentation on starting with the local environment that should be required reading.
2. Managing the local and staging development environments
At this point, you’ll have a local development environment (hopefully DevKinsta!) and a site that is complete enough to move to the next step. Creating a staging environment uses both DevKinsta’s functionality and that of the Kinsta API. Let’s break this down into a few short steps.
Creating a staging environment
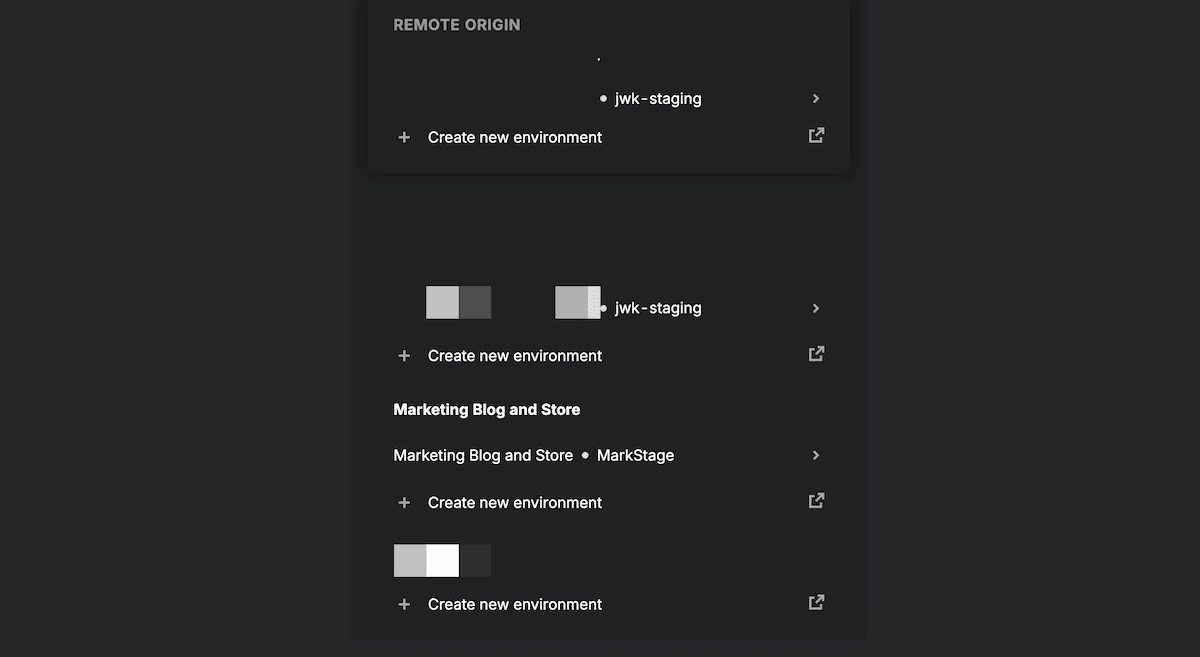
First, look to create a new staging environment with the Kinsta API. This is something you can do within DevKinsta through links to the MyKinsta dashboard:
However, the Kinsta API has endpoints to cover every practical use case. For instance, you can create both plain and populated sites and environments. We’d recommend using plain environments at this point, as you can have peace of mind that your local site will move to a ‘fresh’ location.
This will need you to first set up a new WordPress site on Kinsta using the appropriate endpoint:
const resp = await fetch(
  `https://api.kinsta.com/v2/sites/plain`,
  {
    method: 'POST',
    headers: {
      'Content-Type': 'application/json',
      Authorization: 'Bearer <YOUR_TOKEN_HERE>'
    },
    body: JSON.stringify({
      company: '54fb80af-576c-4fdc-ba4f-b596c83f15a1',
      display_name: 'First plain site',
      region: 'us-central1'
    })
  }
);

const data = await resp.json();
Once the site is in place, you can fetch a list of sites through passing a company ID:
…
  "company": {
    "sites": [
      {
        "id": "54fb80af-576c-4fdc-ba4f-b596c83f15a1",
        "name": "firstsite",
        "display_name": "First site",
        "status": "live",
        "siteLabels": [
          {
            "id": "54fb80af-576c-4fdc-ba4f-b596c83f15a1",
            "name": "Do not remove"
…
Once you complete this, you can then create the staging environment using the right site ID:
const siteId = 'YOUR_site_id_PARAMETER';
const resp = await fetch(
  `https://api.kinsta.com/v2/sites/${siteId}/environments/plain`,
  {
    method: 'POST',
    headers: {
      'Content-Type': 'application/json',
      Authorization: 'Bearer <YOUR_TOKEN_HERE>'
    },
    body: JSON.stringify({
      display_name: 'staging',
      is_premium: false
    })
  }
);

const data = await resp.json();
We’d also recommend you create a database for the staging site while you’re here. In a few moments, you’ll overwrite it with your local database, but initializing a placeholder is a good practice:
…
  {
    method: 'POST',
    headers: {
      'Content-Type': 'application/json',
      Authorization: 'Bearer <YOUR_TOKEN_HERE>'
    },
    body: JSON.stringify({
      company_id: '54fb80af-576c-4fdc-ba4f-b596c83f15a1',
      location: 'us-central1',
      resource_type: 'db1',
      display_name: 'test-db',
      db_name: 'test-db',
      db_password: 'example-password',
      db_user: 'example-user',
      type: 'postgresql',
      version: '15'
    })
  }
);
…
Depending on your setup, you may also need to add a new domain to Kinsta, which you can do through a simple endpoint. However, once staging is set up, you can look to push your local changes to it.
Syncing changes from local to staging
The exact process for pushing your changes to staging will depend on your specific setup and tools. A general and typical approach may look like the following:
- Make changes to your local WordPress site.
- Commit the changes to Git.
- Push those changes to remote (for example, GitHub or GitLab).
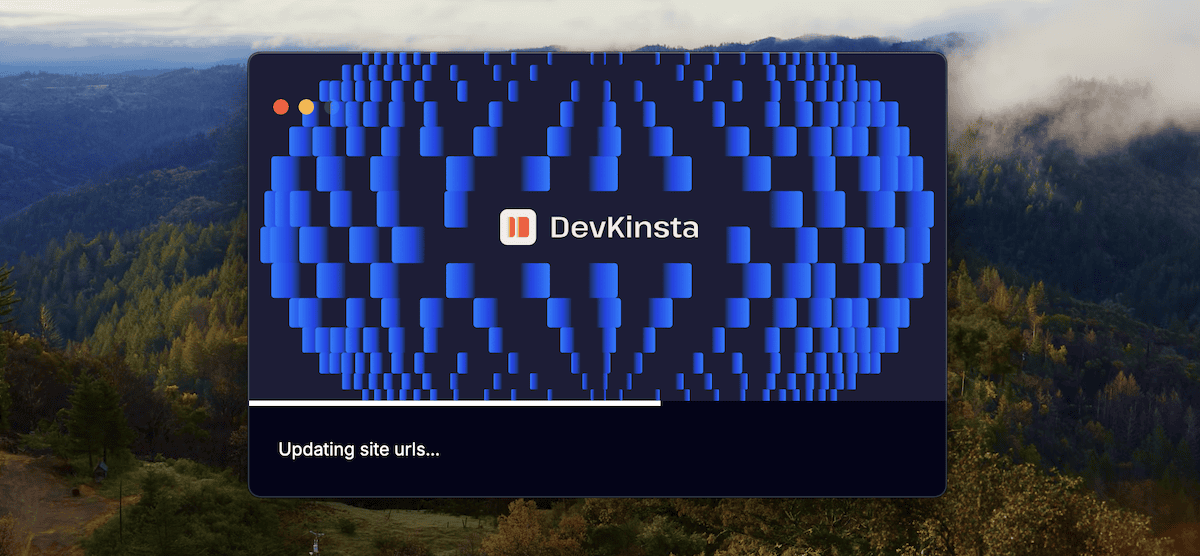
- Use DevKinsta or the Kinsta API to update the staging environment with the latest changes.
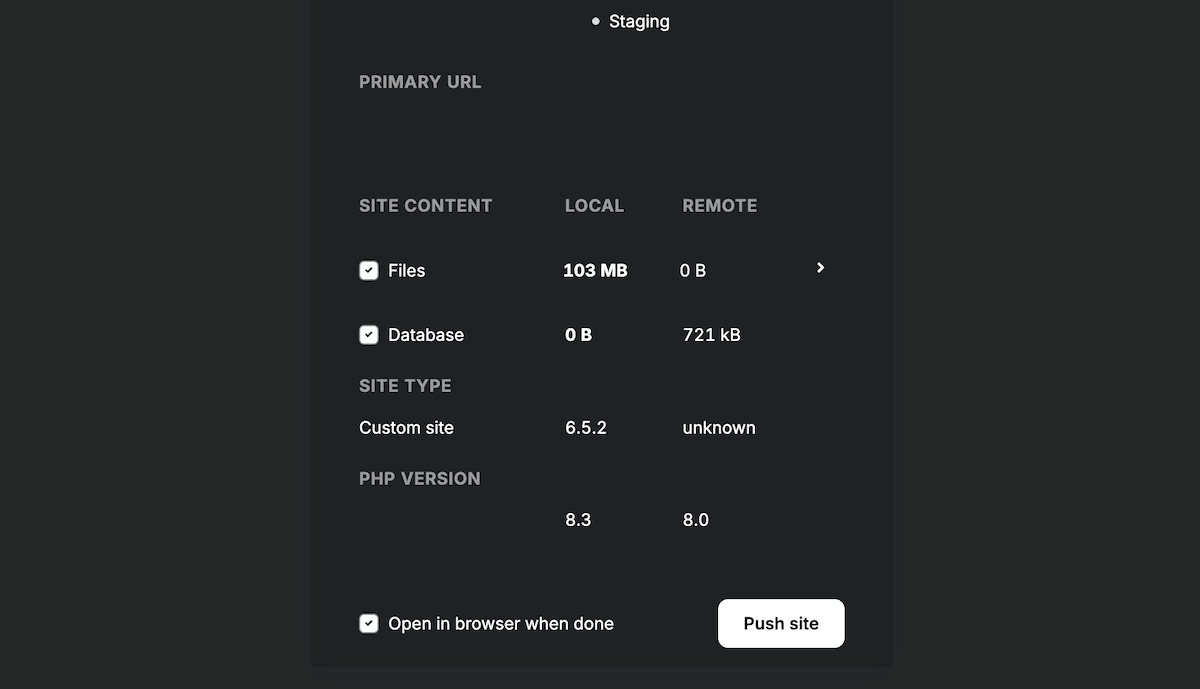
We won’t cover the version control here, but DevKinsta offers handy tools to help you push changes to your Kinsta hosting:
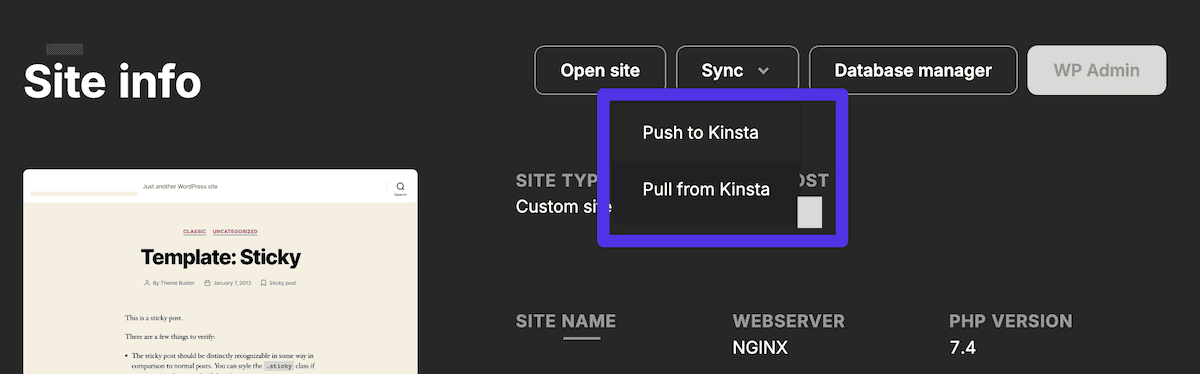
This will let you choose the environment from across your entire hosting server. Once you do this, you can also choose to push your database – again, something not many local development tools let you do:
Once you populate your Kinsta staging environment, the API will come in handy. For example, you can script and run an initial backup, which only needs an environment ID and tag:
  {
    method: 'POST',
    headers: {
      'Content-Type': 'application/json',
      Authorization: 'Bearer <YOUR_TOKEN_HERE>'
    },
    body: JSON.stringify({
      tag: 'my-awesome-backup'
    })
  }
);
You could also install any further themes and plugins at this stage if you wish. At this point, our DevKinsta usage will end because you can deploy your site using the Kinsta API from here on out.
3. Pushing changes from staging to production
Before you look to push changes to production, you’ll want to handle a few crucial tasks, all with the Kinsta API:
- Update your IP blocklist if necessary.
- Set up your CDN and caching.
- You may need to create another database for your production site.
- You may also need to create a new live environment.
From here, you should fully test your site within staging and get approval from your client. At this point, you can look to deploy. Kinsta gives you a couple of options for this:
- The MyKinsta dashboard lets you push changes from staging to production.
- You can use the Kinsta API to deploy changes programmatically.
We’re (of course) going to focus on the second option, as it allows for a more automated and streamlined workflow.
Using the API to deploy changes
The Kinsta API provides several ways to move an environment. You can push your staging environment to your production one or clone it.
const siteId = 'YOUR_site_id_PARAMETER';
const resp = await fetch(
  `https://api.kinsta.com/v2/sites/${siteId}/environments`,
  {
    method: 'PUT',
    headers: {
      'Content-Type': 'application/json',
      Authorization: 'Bearer <YOUR_TOKEN_HERE>'
    },
    body: JSON.stringify({
      source_env_id: '54fb80af-576c-4fdc-ba4f-b596c83f15a1',
      target_env_id: '54fb80af-576c-4fdc-ba4f-b596c83f15a1',
      push_db: true,
      push_files: true,
      run_search_and_replace: true
    })
  }
);

const data = await resp.json();
Regardless, it’s a good idea to create another backup of every environment you’re running so you can recover if something goes wrong.
Typical practices and tips for using the Kinsta API
The Kinsta API is a powerful way to carry out programmatic changes to your sites and environments. As such, you need to take care when using it, as if something goes wrong, it will be your responsibility to repair it.
With this in mind, let’s run over a few tips, tricks, and typical practices you should integrate into your own development workflow:
- Secure your API credentials. You should never share your API token with anyone or include it in remote Git pushes. Instead, use environment variables or similar to store and access your credentials. The Kinsta API includes an authentication endpoint to assist you.
- Provide access based on the principle of least privilege. Manage access to your Kinsta account and API properly. Only provide access to team members who need it. In addition, you should build in regular reviews and updates of any access permissions.
- Employ error handling. When making API requests, consider graceful error and exception handling. The Logs endpoint could help here to identify and fix issues fast.
- Keep the API up to date. We look after any changes and updates to the Kinsta API, but you should monitor this, too. The Kinsta changelog will be your first stop here, although scanning the existing documentation for new changes is recommended, too.
This matters much more when it comes to further collaboration with teams and any automation you may want to employ. Our final section looks at this in a little more detail.
Automating your development workflow
One of the biggest benefits of using the Kinsta API is the ability to automate repetitive tasks in your development workflow. By writing scripts or integrating with other tools, you can streamline processes and save time.
To fully streamline your workflow, you can automate your staging to production push by integrating the Kinsta API with your CI/CD pipeline. This can be a complex and subjective process that may even change from project to project. For example, here’s an example workflow for a suitable script:
- Implement a trigger for when changes push to a specific branch within Git (such as a release branch).
- Create a manual backup of the production environment using the API.
- Replace the production environment with the staging environment using the relevant endpoint.
- Run any necessary post-deployment tasks (such as clearing the cache, running database migrations, and more).
This is the big plus point of the Kinsta API. You can automate almost every aspect of your workflow to ensure consistent and reliable deployments. There’s plenty more you can do with this, too:
- Create backups before key pushes. This should be a big part of your deployment workflow so you have snapshots of every stage of the process.
- Monitor site performance and receive notifications. Kinsta’s APM tool can keep tabs on any metrics anomalies you may need to know about. With the Kinsta API, you have a set of endpoints to monitor specific metrics. From there, you can set up notifications within the MyKinsta dashboard.
- Review site users often. There’s a simple endpoint available that gets a list of users based on site ID. Setting that up to show during key workflow moments could help keep your sites safe.
The beauty of the Kinsta API is how much you can control using programmatic methods. The scope is wide here, and you could even create custom dashboards that show some of these metrics or options for an even smoother development workflow.
Summary
The Kinsta API is arguably the only way you should streamline your development workflow. By leveraging the various endpoints for managing sites, environments, backups, and more, you can automate repetitive tasks, improve collaboration, and deploy changes with confidence.
What’s more, integrating the Kinsta API into your development process can help you customize the process for each project. This, in turn, can help you deliver high-quality sites faster than ever before.
What aspect of the Kinsta API appeals to your development workflow? Let us know in the comments section below!


Leave a Reply